
The JAV Board 19 Interactive Flat Panel is designed for meetings, presentations, teaching, wireless collaboration, and AI-powered productivity. When using this smart board for the first time, you need to complete several basic settings, including power connection, language setup, network connection, Google account setup, region selection, and PIN code settings.
This guide explains how to set up your JAV Board 19 Smart Board for first-time use.
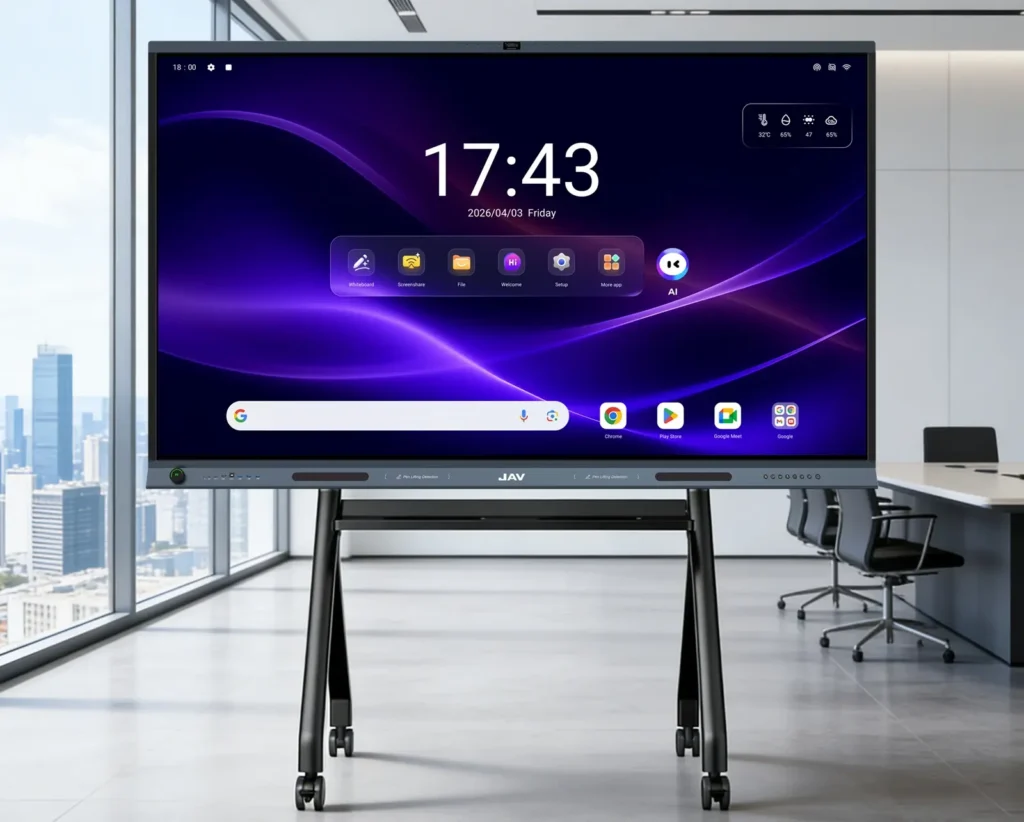
Before You Start
Before turning on the JAV Board 19, please place the device in a safe and stable location. Do not place heavy objects on top of the unit, keep liquids away from the device, and avoid direct sunlight or heat sources.
Also make sure the device has enough ventilation space. It’s recommended to keep more than 10 cm of space on the left, right, and back sides, and more than 20 cm on the top for heat dissipation.
Step 1: Connect the Power Cable
Use the original power cable provided with the device.
Before connecting the power, check that:
- The power cable is not damaged.
- The AC power source is properly grounded.
- The local voltage matches the device requirements.
- All necessary cables are connected before plugging in the power.
Note that the power switch uses “I” for power on そして “O” for power off.
Step 2: Turn On the JAV Board 19
を押します Power button on the front control panel or use the remote controller to turn on the device.
The front control panel includes commonly used controls and interfaces, such as:
- Power button
- Volume buttons
- Screen lock
- Touch lock
- Eye care
- Record
- タイプC
- HDMI
- Touch
- USB ports
- Microphones
- カメラ
The remote controller also supports power on/off, mute, volume adjustment, navigation, menu, input, and home functions.
Step 3: Complete the Boot Wizard
When the JAV Board 19 starts for the first time, the Boot Wizard will appear.
The Boot Wizard guides users through several basic setup steps, including:
- Setting up the system language
- Connecting to a wireless network
- Copying apps and data
- Reviewing Google Terms of Service
- Selecting the region
- Setting a PIN code
The Boot Wizard will appear during the first startup and help users complete wireless network setup, account setup, and PIN code setup.
Step 4: Select the System Language
Choose the language you want to use on the JAV Board 19.
You can also change the language later by going to:
Settings > System > Language & Input
The system supports multiple languages, including Simplified Chinese, Traditional Chinese, English, Spanish, Korean, Japanese, Russian, Vietnamese, French, German, Italian, and more.
Step 5: Connect to Wi-Fi or Wired Network
During the Boot Wizard, connect the JAV Board 19 to the internet.
You can use:
- Wi-Fi
- Wired network through RJ45
- 2.4G / 5G wireless network
The Board 19 product document lists support for 2.4G/5G/WiFi 6 wireless network, wired network, and Bluetooth.
A stable internet connection is recommended for:
- Google services
- App downloads
- System updates
- ワイヤレス画面共有
- Cloud files
- Online meetings
- AI-related functions
Step 6: Sign In or Set Up Your Account
Follow the on-screen instructions to add or sign in to an account when required.
The setup process may include Google-related steps, such as reviewing Google Terms of Service and completing account-related settings. This is useful for accessing Google Play, Chrome, Google Meet, and other supported apps.
Step 7: Set the Region, Date, and Time
Choose the correct region and time settings.
You can adjust these settings later from:
Settings > System > Date & Time
In this section, you can:
- Turn on automatic time update
- Set date and time manually
- Choose date format
- Choose time format
- Set the time zone
Automatic time update requires an internet connection.
Step 8: Set a PIN Code
During first-time setup, the system may ask you to set a PIN code.
A PIN helps protect the device and can be useful when using screen lock or user management features. In System Security settings, users can also set the screen lock method and automatic screen lock time.
Step 9: Check the Home Screen
After setup is complete, the JAV Board 19 will enter the home screen.
From the home screen, users can access common apps and functions such as:
- ホワイトボード
- 画面共有
- File manager
- Welcome screen
- 設定
- More apps
- AI tools
The home screen also displays date and time. These can be adjusted manually in Settings > System > Date & Time.
Step 10: Use the Sidebar for Quick Access
The JAV Board 19 includes a sidebar for quick operation.
To open the sidebar, tap the translucent bar on the left or right side of the screen. Tap a blank area to close it.
The sidebar includes quick shortcuts such as:
- Back
- 家
- Multitasking
- Control Panel
- Annotation
- Signal Source
- 設定
This is useful when you need to switch apps, open settings, or access annotation tools during meetings or presentations.
Step 11: Connect an External Laptop
To connect a laptop to the JAV Board 19, use an HDMI cable and a USB touch cable.
次の手順に従ってください。
- Connect the HDMI cable from the laptop to the HDMI port on the JAV Board 19.
- Connect the USB cable from the Touch port on the JAV Board 19 to the laptop.
- Turn on the laptop and the JAV Board 19.
- Select the HDMI channel as the input source.
The HDMI cable transmits video and audio, while the USB touch cable enables touch control from the JAV Board 19 screen. The best resolution for external computer input is 3840 × 2160.
Step 12: Check for System Updates
After the first setup, it is recommended to check whether a system update is available.
Go to:
Settings > System > System Update
This section displays the current firmware version. Users can refresh to detect the latest version, and when a new version is available, the update option will appear.
First-Time Setup Checklist
Before using the JAV Board 19 in a meeting room or classroom, make sure you have completed the following:
- Power cable connected correctly
- Device turned on
- Language selected
- Network connected
- Region selected
- Date and time set
- PIN code created
- Google/account setup completed if needed
- Home screen checked
- Sidebar tested
- External laptop connection tested if needed
- System update checked
Troubleshooting During First Setup
The remote controller does not work
Check whether the batteries are installed correctly. Make sure there are no obstructions between the remote controller and the receiver. The remote controller works within about 8 meters and within a 30-degree angle from the receiver.
The device has no network connection
Check whether Wi-Fi is connected correctly or use a wired RJ45 network connection. Make sure the router or network cable is working properly.
The date or time is incorrect
へ移動 Settings > System > Date & Time. You can enable automatic time update or manually adjust the date, time, time zone, and display format.
The laptop image does not appear
Check whether the HDMI cable is connected correctly and whether the correct HDMI input source is selected.
Touch control does not work with the laptop
Make sure the USB touch cable is connected from the JAV Board 19 Touch port to the laptop’s USB port. HDMI alone only transmits video and audio; the USB touch cable is required for touchback control.
まとめ
Setting up the JAV Board 19 Interactive Flat Panel for the first time is simple. Connect the power, turn on the device, complete the Boot Wizard, connect to the network, set the language and region, create a PIN, and check the home screen. After setup, you can start using the JAV Board 19 for whiteboarding, screen sharing, video meetings, file presentation, and AI-powered collaboration.